What Is the Best Poly Finish to Show Off the Growth Rings of a Log Slice for Art
This postal service may contain affiliate links. We may earn a small commission from purchases made through them, at no boosted cost to you.
Epoxy resin offers a multifariousness of possibilities that is unlike any other textile. In conjunction with wood, you tin can achieve a wide range of design possibilities: epoxy resin coated with wood every bit a protective layer, woods in cast molds, epoxy resin river tables, and much more is possible. We will evidence yous what is possible with the combination of epoxy resin and wood and give y'all specific instructions, ideas, and tips.
Table of Contents
- one Different Properties of Resin Products
- 1.1 Consistency
- 1.2 UV Protection / Resistance to Yellowing
- 1.iii Surface Hardness
- ii The best Wood Epoxy Recommendations
- 2.1 Laminating Resin for articulate Coats / sealing and hard Surfaces
- 2.2 Casting Resin for filling Cracks and deep Castings
- iii Wood and Epoxy: The Supplies You Need
- four Step one: Forest Training
- v Step 2: Mixing the Resin
- 6 Application 1: Sealing Wood
- 6.1 How to employ Epoxy Resin on Forest
- 7 Application 2: Epoxy Forest Filler – Filling and Repairing Woods
- vii.1 How to fill Cracks in Wood with Epoxy
- 8 Application 3: Casting Wood in Resin (Resin Casting)
- 8.1 Tutorial for Casting Woods in Resin:
- 9 Coloring Resin to Create Dissimilarity with Wood
- 9.1 Liquid Pigment
- 9.2 Color Pigments and Powders
- 10 Sanding after Curing
- xi The concluding Step – Polishing, Oiling, and Finishing your Artwork
- 12 Application 4: Repairing Wood with Epoxy Resin
- 12.1 Step ane: Take Out or Relieve the Damaged Parts
- 12.2 Step ii: Use a Liquid Epoxy Consolidant
- 12.3 Step 3: Set up the Filler for the External Surface
- 12.4 Stride 4: Fill the Cavities with Epoxy Filler
- 12.five Pace 5: Shape the Filler into the Desired Shape
- 12.half dozen Step 6: Modify the Shape
- 12.seven Stride seven: Pigment for Protection
- thirteen Processing Challenges – Tips and Tricks
- thirteen.1 Does Epoxy Resin bind to Forest?
- 13.ii The Epoxy Resin shrinks too much
- xiii.3 The Epoxy Resin sinks into the Wood
- thirteen.four Several Bubbling in Bandage Resin
- 13.v The optimal Working Temperature
- 13.6 The Resin is extremely hot during Casting
- 13.7 The Epoxy Resin cures too quickly
- 13.8 Resin appears cloudy after Curing
- xiii.nine Preventing Yellowing
- 13.10 Storing Epoxy Resin
- 13.11 Is the Cured Epoxy Food Safe?
- 14 Computing the required Quantity of Epoxy Resin – the Epoxy Calculator from acrylgiessen
- 15 Health Advice for Working with Resin
- xvi More interesting Blogposts about Epoxy Resin
Different Properties of Resin Products
Epoxy resin or resin is a two-component material that cures within a few hours of the components being mixed, and can then exist cutting, footing, and polished. In contrast to polyester and polyurethane resins, resin epoxy shrinks considerably less during curing. All other products could come loose from the wood in a few hours or days and every bit a effect, are not advisable to use. In that location are products for different areas of application, and it is important to cull the right product. Y'all can besides have a await at our in-depth article where we listing the all-time epoxy resin for all your projects.
Consistency
- high-viscosity resin for coating layers
- low-viscosity resin for casting molds or for Resin Art
UV Protection / Resistance to Yellowing
Resin reacts differently to UV rays. The resin unremarkably comes in a clear grade and tends to turn yellow due to sunlight and is no longer completely translucent. Nevertheless, there is a highest UV-resistant epoxy resin for outdoor and piece of furniture apply that is resistant to yellowing. In some instances, additives that protect against UV rays can be mixed in to reduce yellowing in the best possible mode.

Surface Hardness
After curing the resin, there can exist a huge difference in surface hardness. Some products are rather soft, other products are resistant to scratches and temperature. For everyday objects such as cutting boards, tabletops, and other items that are exposed to high mechanical stress, it is worth ownership a college quality resin.
Tip: Make certain you stick to the specified mixing ratio so the resin cures well.
The all-time Wood Epoxy Recommendations
You tin't get wrong with the post-obit professional person products and are guaranteed to go good results. They are characterized by fiftyess shrinkage, good quality of flow, and proficient compatibility. In our opinion, these are the best epoxies for woods:
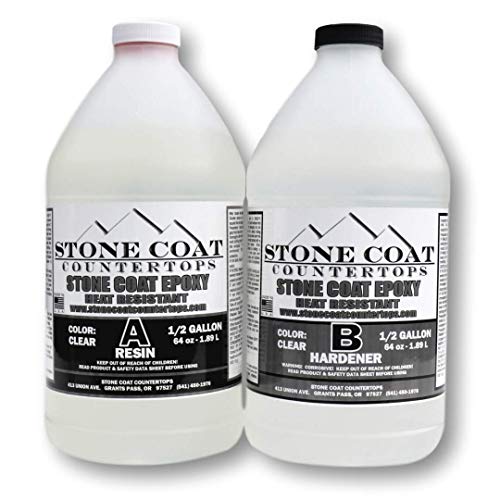
Laminating Resin for clear Coats / sealing and hard Surfaces

- one : i mix ratio by volume (100 A to 83 B by weight)
- Enhanced UV inhibitors to resist yellowing
- Self-leveling, super clear results
View on Amazon
- Cured in 24 hours, self-leveling
- Heat resistant up to 425°F, crystal articulate and UV stable
- Scratch-resistant, food-safe, nada VOC'southward
View on Amazon
Casting Resin for filling Cracks and deep Castings
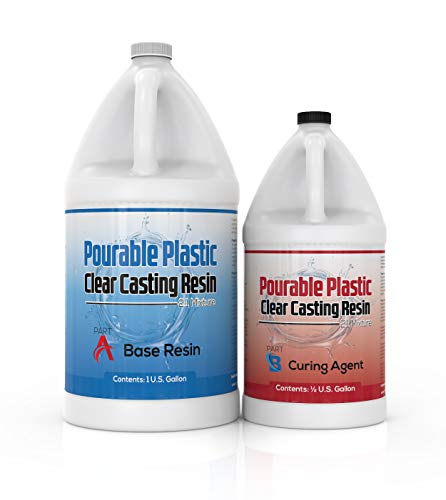
- 2 : ane mix ratio by volume (100 A to 44 B by weight)
- Thick pours up to 2" per application, low viscosity and long working time
- Super clear results, compatible with pigments and dyes
View on Amazon
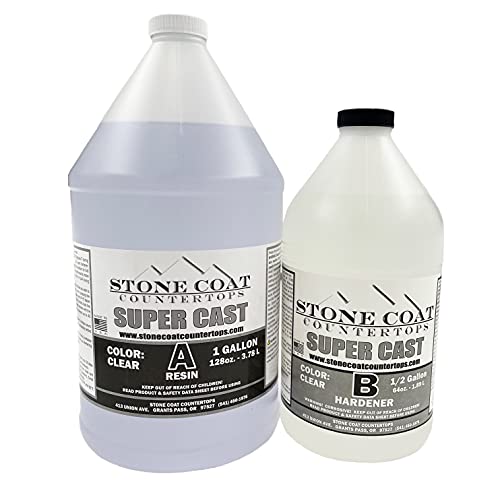
- Designed to exist poured over 3/4'' per cascade
- Super clear results, compatible with pigments and dyes
- Perfect for epoxy tables and deep resin molds
View on Amazon
Wood and Epoxy: The Supplies You Need
You will need the following things in guild to employ epoxy resin on wood:
- GE 100% Silicone Caulking
- Caulking gun
- Silicone Oil
- Orbital Sander
- Sandpaper
- Grinding and polishing paste for sleeky surfaces
- Orbital Buffer / Polisher
- High-Quality Wood Oil
- Resin Mixing Cups and Stir Sticks
- Heat Gun
- Butane Torch
- Level
- Professional Masking Tape
- High-Density Drop Cloth
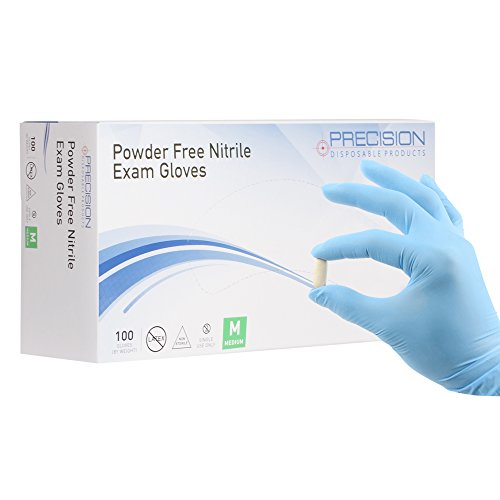
- Nitrile Gloves
- Respirator Mask
- Center Protection
- Wood of your choice

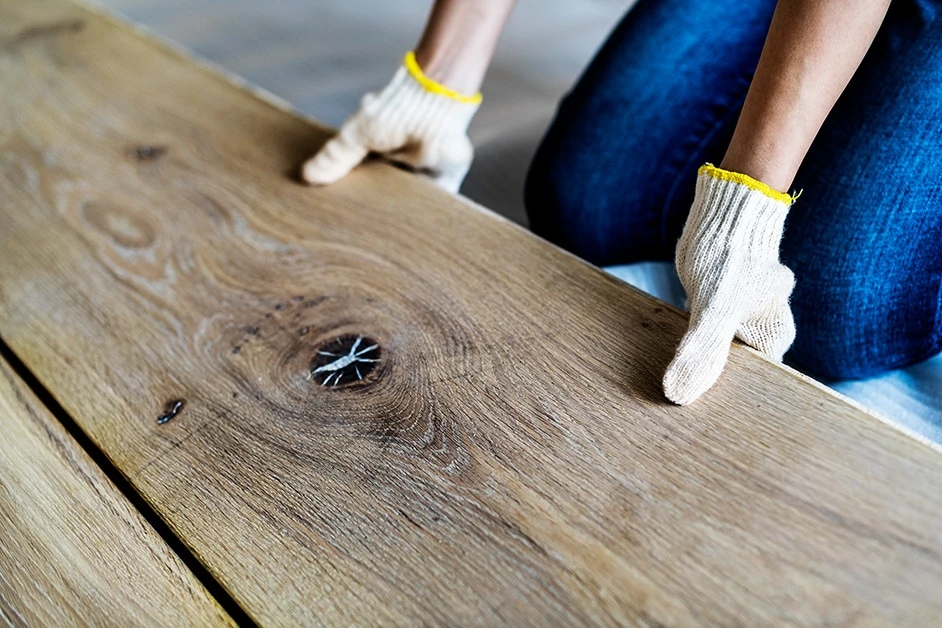
Step 1: Forest Grooming
The wood should be prepared before coating with epoxy resin or using for embedding epoxy resin:
- Sanded
- Degreased
- Not pretreated with oil
- No hairs/fibers or loose pieces of bawl
Small pieces tin can be sanded by hand. For larger surface areas such as a wooden table, nosotros recommend using an orbital sander to forbid stress marks.
Tip: Earlier pouring, use a chimera level to check if the wooden surface is absolutely level. Due to flow characteristics, the epoxy resin will otherwise only menstruation to the lowest part and not spread equally desired.
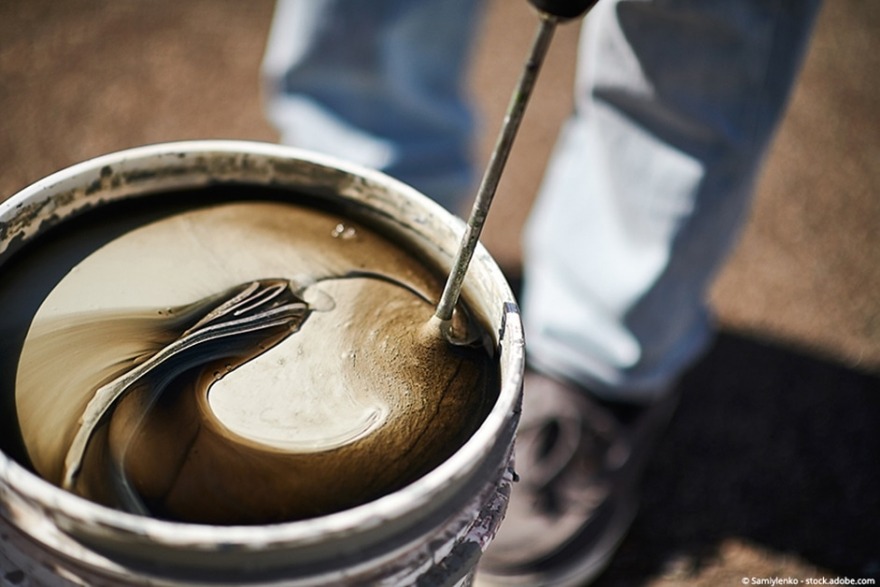
Footstep 2: Mixing the Resin
The two components (resin and hardener) must be mixed together in a container. The entire mixture must be mixed well over several minutes. It is the only manner to ensure the curing process volition work out equally planned. In the end, it needs to accept a uniform fluidity without any streaks. Only so tin the color be added.
Wear nitrile gloves and then that your skin does non come up into direct contact with the fluid.
The mixing ratio can be constitute on the packaging. On the market today in that location are iii different systems: a one:1 ratio, a 2:1 ratio, and a 4;1 ratio. Epoxy resin is usually sold with the resin and hardener pre-packaged in the exact amounts needed.
Plastic or wooden spatulas are best for mixing. Make sure to stir carefully to minimize air bubbles.
You are now prepare to pour, fill, or utilise the resin mixture.
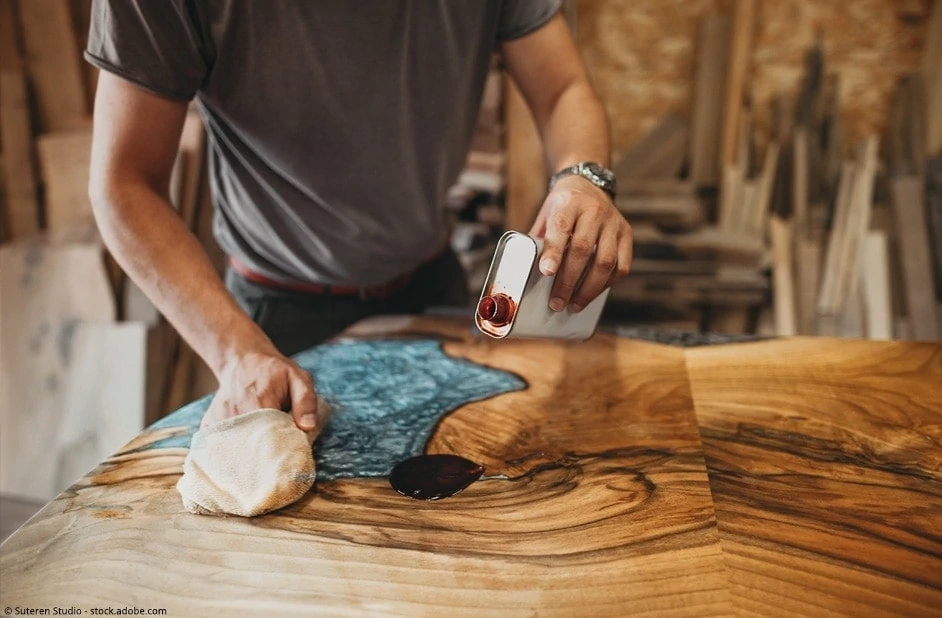
Application 1: Sealing Wood
Epoxy resin is suitable for sealing wood too as waterproofing it. Some examples of this application include sealing a tabletop, wooden boards in the kitchen, or piece of furniture. Sealing kitchen work surfaces, wooden flooring, or whatsoever other application is also possible with it. As you can see, application possibilities are endless.
How to employ Epoxy Resin on Wood
Later on the wood has been prepared co-ordinate to Step i and the resin mixture has been stirred, y'all are gear up to begin. The greatest challenge lies in the fluidity of the material: as long as the resin has non cured, it quite quickly flows wherever information technology tin can.
- If yous want to make a table out of epoxy resin, you have to record the edges and so the resin does not run over and drip onto the floor.
- Cascade the epoxy over the wooden surface and spread information technology over the unabridged surface with a spatula or a duster. If you calculated the necessary amount correctly, a completely covered surface that levels out automatically because of the catamenia property is created.
- Remove air bubbles with a hot air gun or a torch
- Equally before long as y'all notice that the viscosity is becoming thicker, you should finish working otherwise you lot will no longer be able to attain a homogenous surface.
- Before you attempt large objects and surfaces, it is recommended that you begin by practicing with a test slice. This is how you get a experience for the process and how to handle the production. Timing should also non be neglected because you only take a maximum of half an hour to seal the entire surface.
Application 2: Epoxy Forest Filler – Filling and Repairing Woods
Old weathered pieces of wood, boards eaten by woodworms, or gnarled pieces of woods with knots are typically not of interest to carpenters. For artistic use, however, this wood is perfect for filling with resin.

How to fill Cracks in Forest with Epoxy
If you have a board with holes or cracks that you would like to fill, first cheque that these are non continuous and that the resin tin't drain through the bottom. Yous can seal these types of holes with tape or use silicone sealant which tin can hands be removed later.
At present you tin fill the cavities with the resin mixtures. Information technology is worthwhile here to color the resin and so in that location is a contrast between the colour of the resin and the color of the woods in the filled areas. Dyes or Paints that glow in the dark or under a blackness light are also exciting possibilities.
After the resin cures, you have to sand the epoxy surface.

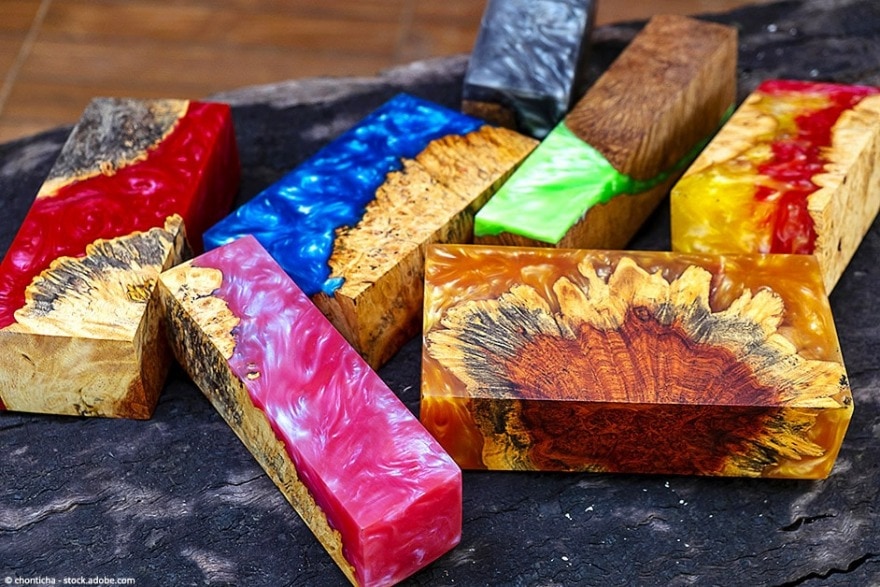
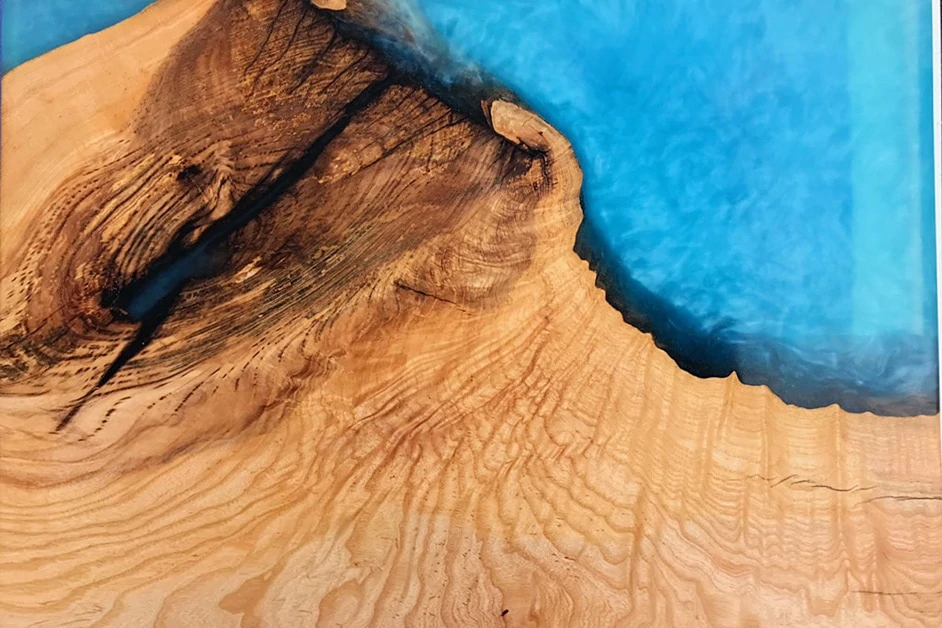
Application 3: Casting Wood in Resin (Resin Casting)
Cute pieces of wood can be completely cast in resin. Pieces of wood with a vivid grain or fine burling are ideal. For example, you tin make epoxy jewelry, use the piece of wood for turning, or create a decorative slice.
Tutorial for Casting Wood in Resin:
There are two possible options for this awarding:
- You can utilise a silicone mold. At that place are special molds for epoxy resin in all shapes and sizes. You place the piece of wood in the desired silicone mold and so cascade in the epoxy resin. Depending on the size of the mold, yous may need to cast several layers so that the resin doesn't go too hot. After it cures, advisedly carve up the mold and the bandage piece, and you tin and so use it again and again.
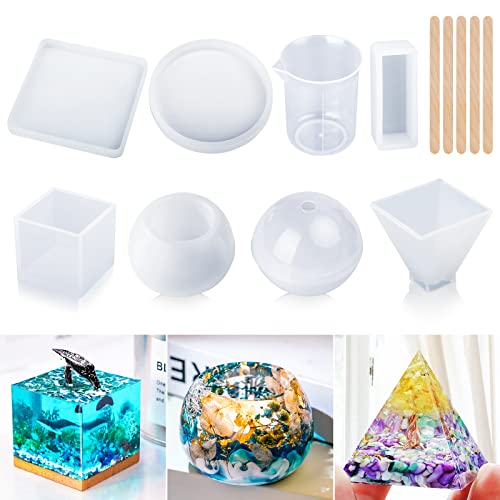
- The Permit'southward Resin kit includes Cube, Pyramid, SPhere, Diamond, Triangular molds
- Polish inside for perfect casting results
- High-quality silicone for a lot of castings
View on Amazon
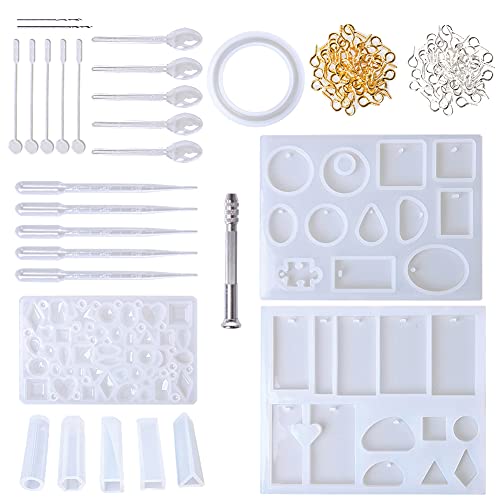
- Fabricated of silicone, which is flexible and smoothen, resistant to tearing
- Tools: screw heart pins, stirrers, droppers, spoons, hand twist drill
- Many unlike shapes, such as square, rectangular, round, etc.
View on Amazon
Make a casting mold yourself. For this process, utilize resin-coated panels that y'all seal with silicone caulking and so sprayed with silicone oil. If you don't use coated boards, the resin will bail to the panels and you won't be able to release the mold.
Coloring Resin to Create Contrast with Wood
Resin can be used when information technology is transparent, but it can also easily be colored. There is a myriad of possibilities, such every bit transparent colors, metallic effects, or opaque liquid colors. Normal acrylic paint won't piece of work as it contains water. The following paints can be mixed with all epoxy resin:
Liquid Paint

- Premium colorants made specifically for use with ArtResin epoxy resin.
- Non-toxic when used equally directed. Non-flammable when torched in resin.
- 24 brilliant colours, each bottle contains 25 ml / 0.85 fl oz.
- Tint epoxy resin to create flow fine art paintings or marbled furnishings with ease.
View on Amazon
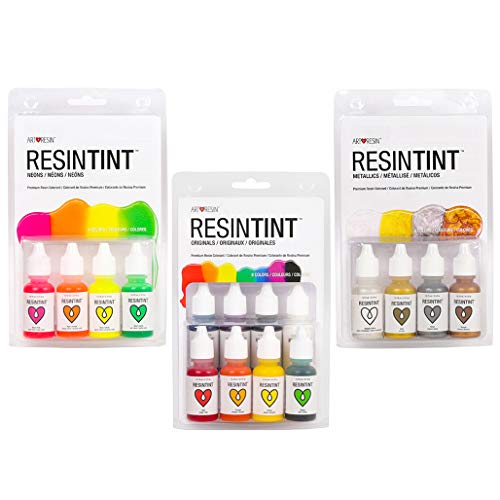
- This is the ResinTint complete set with all basic colors
- Besides included: metal & neon set contains 8 shimmering colors
- High-quality coloring agents for epoxy resin
View on Amazon

- These liquid pearl pigments from SYlive are very suitable for coloring epoxy and are available in various shades.
- For the special bling character in your resin paintings.
View on Amazon

- The airbrush colors from Jacquard are well proven for mixing with resin
- They are highly pigmented, very brilliant and lightfast
- With this set up y'all take tin add shimmering accents to your pourings
View on Amazon
Colour Pigments and Powders
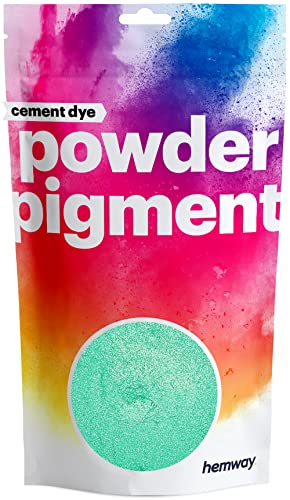
- Hemway has ane of the largest ranges of pigment pulverization dyes
- Yous tin can but mix this slowly into resin until the desired ratio is reached
- Colorfast and lightfast, then your works will nonetheless shine brilliantly even after a long time
View on Amazon

- Jacquard Pearl Ex pigments are very high-quality metallic colour pigments
- They tin be candy very well with resin and produce shimmering, deep shades
- With these pigments you lot give your resin paintings that certain something
View on Amazon
Sanding after Curing
To be on the safety side, we recommend waiting a week before sanding and polishing the resin surface. Seemingly cured resin can be soft nether the surface and won't leave you with a nice finish.
Depending on the size of the object or the surface, yous tin use sandpaper with a fine grain for modest objects. This sandpaper has been useful for this and can be used for dry out or moisture sanding. Y'all should always sand from fibroid to fine grain then that in that location are no visible traces of sanding.
For larger surfaces similar River tables, floors, countertops, etc., you should use an orbital sander for the all-time results. The orbital sander non only rotates but gives you much effectively sanding. Additionally, sanding is done in a fraction of the fourth dimension and it is much less probable to sand unevenly in some places.
The concluding Footstep – Polishing, Oiling, and Finishing your Artwork
Epoxy resin does not necessarily require surface treatment. However, depending on the application, the wood next to it is raw and untreated. Also, fine stress marks in the epoxy resin may still exist present and the depth event is less-than-optimal. In that case, the following procedures tin can be utilized:
- Accept a fine polishing paste on a rag and rub in a circular motion over the epoxy resin. You will polish the surface and eliminate any grind marks present on the surface of the resin. Be careful that the paste is not spread onto the forest, otherwise the pores of the wood volition get clogged. For larger surfaces, an orbital buffer/polisher is recommended.
- Wipe the polishing paste abroad carefully, making sure there is no residue. The surface should now shine beautifully.
- If you lot are all the same not satisfied, repeat the offset steps.
- At present the wood needs a final handling. Resin epoxy can also withstand a cease. Employ a high-quality woods oil, apply generously with a rag, permit it absorb for a few minutes, so wipe dry. Yous can also employ a lacquer. Boosted steps are so needed for further polishing at the end.
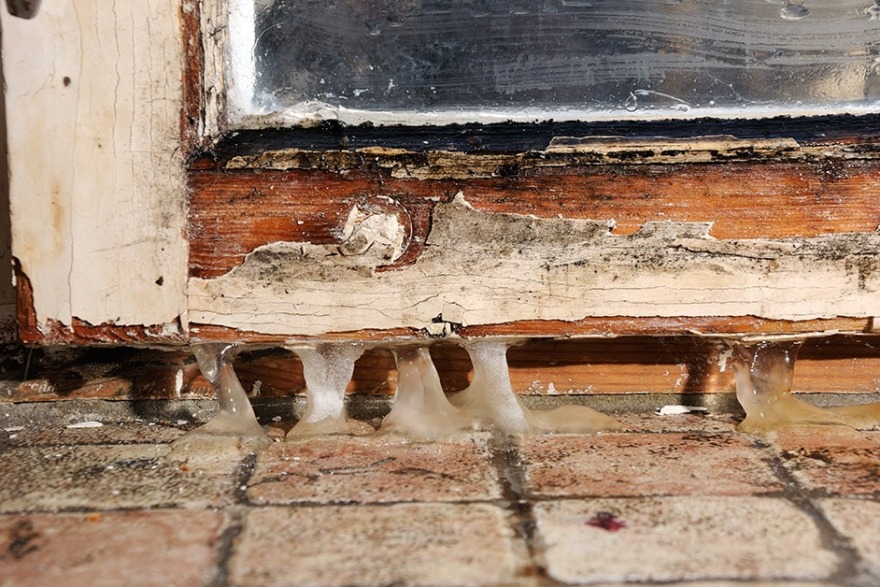
Awarding iv: Repairing Forest with Epoxy Resin
Before starting to work on anything, you need to offset identify what is the underlying problem, the reason for it. If you are not able to effigy it out on your ain, then become help. The problem will always differ, so will its solution.
For instance, the wood is rotting due to moisture that is emitted through another function of the object. In this case, you would accept to modify the rotten office for something more than resistant to moisture similar redwood. Apart from this, it would as well exist good if a sheet of metallic tin be kept in betwixt them to avoid any kind of contact.
Now, this is a nifty mode to control issues, which led to the offset outcome. Another kind of trouble that may arise is that the paint on the wood gets old and ineffective, and then the wood absorbs water and rots. This can exist easily repaired past applying some other coat of paint.
At present, in these situations, the repair can be easily conducted by introducing new materials to the surroundings and eliminating the reason for the specific problems. But in cases where the causes are much more complicated, this can become a tough task to undertake. This is when epoxy resin can come up to the rescue.
The merely circumspection that you will take to take with epoxy is that y'all will take to let the wood dry out completely, which can have longer than yous await. If this is not done, and then the wood can rot further due to the moisture trapped. As such, epoxy resin and wood will not bail properly.
Now that you have an idea about how to starting time, allow'southward learn step-by-step, the process of repairing wood with epoxy resin.
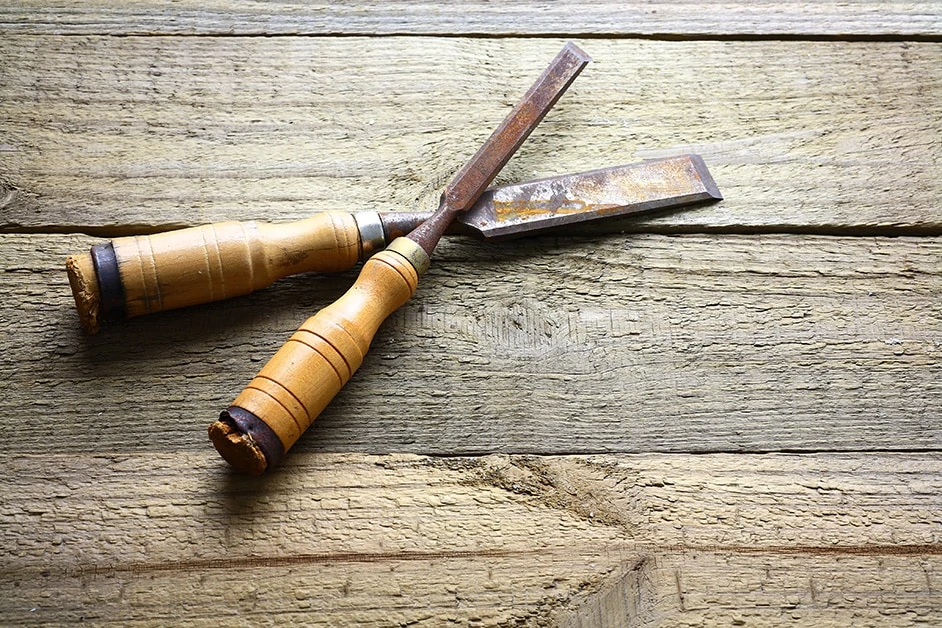
Step one: Take Out or Save the Damaged Parts
Using a screwdriver, try to determine the extent of damage past poking the parts which are rotten or have started to putrefy. At present, these parts should be either systematically removed or should be secured with an epoxy consolidant.
For removing all the required parts, yous would crave a paint scraper, a screwdriver, and a chisel. Once you are sure how much is damaged, kick off the process by taking off the upper layer of paint along with the rotten parts of the wood. There is a possibility that if the pigment is old, it also contains atomic number 82 which can be toxic. For this, you must read about removal techniques to keep it safe.
If the part has some hope in terms of being rescued and has dried out sufficiently, then drill ¼ inch holes, each 1 inch apart, and let the epoxy consolidant work its magic. It should soak into the rotten piece of woods. If the surface is vertical, and so information technology would exist better to accept deeper holes, and then that the consolidant gets maximum space inside and wet will besides get infinite to go out letting the epoxy to soak.
If, by mistake, you drill right through the woods, you can use putty or clay to secure the bottom to stop the epoxy consolidant from leaking. For agreement how to use the consolidant meliorate while wood repairing with epoxy resin, read the instructions provided in the side by side step.
Step 2: Use a Liquid Epoxy Consolidant
Choose a ventilated area to work or prepare yourself with a respirator to counter the fumes. How to apply the consolidant to a large extent depends on the instructions provided by the manufacturer. Read them at to the lowest degree twice as proportions tin get tricky with epoxy resin, and they have to be exact in case of forest epoxy in particular.
One time the mixture is prepared, squeeze it into the holes that have been drilled on the wood for the required repair. A small brush tin help to apply the consolidant with ease. Keep doing then until the entire piece is saturated and has captivated the liquid throughout.
It is of import to let the wood dry out after this, at least for a calendar week. That is why keeping information technology protected nether a plastic sheet, and so that information technology is protected from dust and pelting, is a good idea. To speed upward the process, you tin place the sheet outside during the sunny hours of the solar day.
Step three: Prepare the Filler for the External Surface
Even if the consolidant has not solidified completely, you lot can move forward to this role. This can be a little catchy to understand, so read advisedly.
To commencement with, scoop the two parts (A and B) of the epoxy filler equal to the size of a golf ball using a wooden stick. Using a putty pocketknife, mix them for some time until they are thoroughly mixed. Characterization the lids of the two parts so that the lids are not mixed up and permanently glued to the wrong containers. The same can exist done for the sticks so that distracting mishaps tin can be avoided.
Also, make sure that the objects that yous are using for mixing are clean for the aforementioned reason. If the new epoxy is mixed with the remains of hardened resin, it will react and reduce your fourth dimension of piece of work.
The temperature will matter a lot after this signal, as information technology will decide when the hardening of the resin filler starts. At around 21°C, you will have thirty minutes to work with information technology. The warmer it is, the faster the epoxy volition harden. If the temperature is colder, the epoxy will take more fourth dimension to harden. That is why it is recommended that the work is conducted in the shade so that all the materials are absurd when they are mixed before they are applied. Only when information technology is washed, the slice can be kept in the sunlight to warm the wood epoxy for faster curing.
Step 4: Fill up the Cavities with Epoxy Filler
Using the putty knife, squeeze the filler into the areas which demand to be repaired. Make certain that you use a fleck of force so that the epoxy resin and the wood are bonded.
To make certain that the filler is used optimally when you are filling deeper areas, y'all can carve parts of another piece of wood and prepare these blocks subsequently the application is completed. Over them, you can put additional paste for better results. Brand sure that the pieces you utilize are of the aforementioned type of material, and the grains are aligned when you set up them.
Stride 5: Shape the Filler into the Desired Shape
Wearing gloves, employ your fingers to get the desired shape. Overfilling the voids tin can go far easier to shape. What is also to exist considered is that the shape does not take to exist perfect and must be adhered to the surrounding materials. Allow the patches harden every bit per the conditions.
Footstep half-dozen: Alter the Shape
Cheque the hardness of the epoxy, and if information technology doesn't dent, that means information technology can exist filed using sandpaper and other tools. Offset, work upward a rough profile using a Surform plane or a rasp. The best guide to follow is the natural shape of the surrounding wood.
Subsequently yous nail the basics, apply sandpaper to add together the particular. This will help you to work on the surface where needed. For improve results, fold the sandpaper around a stick or a cylindrical body, then you tin can sand more accurately, and you lot don't accidentally sand areas you don't want to. This step has to be undertaken with great patience and precision. Don't rush and make sure that only the areas you wish to work on are affected.
If more epoxy is removed, you tin can e'er go for a second layer application. Before doing so, make sure that the first layer is dusted, and the filler is precisely mixed. If you lot wish to have a thinner layer, you can mix some consolidant and then add filler to go the correct consistency. Rut the new layer using a dryer, and and then you can continue with sanding again. If you then paint a proper layer over the epoxy, it can terminal for a very very long time.
After y'all have sanded beginning with 80 grit sandpaper, use 120 grit sandpaper to refine your work. While sanding, your eyes must exist protected, so don't forget to vesture a pair of heart goggles and a mask for your nose and oral cavity. Make clean the dust using a vacuum and acetone.
Step 7: Paint for Protection
Start with a primer and and so add two coats of acrylic paint to secure the epoxy resin and wood. Use a polyurethane caulk to finish the concluding layers. Brand certain that the repaired areas are checked every year for repainting or recaulking.
Forest repairing with resin epoxy can exist easily done with the to a higher place procedure. Make certain all the precautions are taken, as mentioned, and read about the materials yous use beforehand for better clarity.
Processing Challenges – Tips and Tricks
Working with epoxy resin casting has its pitfalls. We have listed the biggest issues for you and will tell you how to avoid or resolve these issues
Does Epoxy Resin demark to Wood?
Yes, epoxy resin by and large sticks to nigh all surfaces. The thinner the resin, the more likely it is to penetrate the pores of the woods and bind to it. Resin with a thick viscosity builds a layer on top instead.
The Epoxy Resin shrinks likewise much
Resin, peculiarly cheap resin, will shrink during the curing process and can lead to fractures or detachments in the surface. Here is a tip: test how the resin volition react on a scrap piece of wood, and if needed, purchase a higher-quality product.
The Epoxy Resin sinks into the Forest
For any porous surfaces such every bit wood, it is particularly of import to seal the surface first. You do not need a separate product for this, rather you lot can but apply a thin layer of resin to the wood and let information technology cure. Then you lot have perfectly prepared the wood for the final surface treatment.
Several Bubbles in Cast Resin
Air bubbles occur when the ii resin components are thoroughly mixed. This tin't really be prevented, but typically they can be removed from the material without a problem: After the casting process yous can use a torch or hot air gun over the surface in quick motions and the bubbles volition rise and disappear. For stubborn bubbles, you can also utilise a toothpick to pause the bubbles. Hair and dust tin also be removed this way. The surface must be all the same liquid and able to level itself back out, nonetheless.
Tip: Don't aplly the heat to one spot for likewise long otherwise the resin will discolor and liquify once more. This can lead to unattractive patches.
The optimal Working Temperature
Ideally, you lot should work with the material at around twenty degrees Celsius/68 degrees Fahrenheit and with as trivial humidity as possible. This volition give you the best results and reduce the loss of quality. Until the curing is complete, ambient temperatures should remain abiding to prevent bully or unevenness. It is recommended that you read the specifications from the respective manufacturers as they differ from arrangement to arrangement.
The Resin is extremely hot during Casting
Depending on the resin used, the advisable thickness of each layer is approx. 1cm-2cm (1/3in-three/4in). The resin can first to boil if you bandage the layers as well thick. For this reason, you lot should effort to pour thin layers and wait until they have hardened, then you can cascade the next layer, and and then on. This will give you lot the desired thickness of the surface.
The Epoxy Resin cures too speedily
The different resins have different curing times. Additionally, the general rule of thumb is the greater the mixture quantity, the faster it cures. It may then be beneficial to split up up the mixture to prevent it from curing prematurely.
Resin appears cloudy subsequently Curing
This could exist because of iii possibilities:
- The epoxy resin is too old and has exceeded its shelf life.
- You did not follow the verbal mixing ratio.
- Y'all are using a low-grade resin.

Preventing Yellowing
For transparent or crystal-clear epoxy resin to retain its brilliance and transparency, yous must purchase a special resin that protects against yellowing. For colored resin, this is not necessary.
Storing Epoxy Resin
Epoxy resin that has not yet been mixed has a relatively brusk shelf life of effectually 12 months from production. Therefore upon purchasing, it is important to pay attention to these dates and apply the cloth within this timeframe. To avoid loss of quality while storing the product, continue it between 10-30 degrees Celsius (50-86 degrees Fahrenheit).
Is the Cured Epoxy Food Safe?
In its cured country, epoxy resin is chemically neutral and fundamentally suitable for contact with food. It is no coincidence that this material is likewise used for prosthetics, aquarium decorations, nutrient tanks, coating for kitchen worktops, and much more than. Withal, nosotros recommend that you read the post-obit carefully. This may vary from manufacturer and arrangement. In that location is a certification that approves employ with food, but information technology is expensive, and very few manufacturers use it.
Calculating the required Quantity of Epoxy Resin – the Epoxy Figurer from acrylgiessen
Resin is relatively expensive and mixed resin must be used chop-chop, which is all the more reason to mix the appropriate quantity. At acrylgiessen.com, we take created an Epoxy Resin Calculator for this purpose to calculate the required amount of resin for the desired area.
Health Advice for Working with Resin
Even if this is not explicitly stated by the resin manufacturer, you should employ the product in a well-ventilated room. Information technology is too recommended that yous habiliment a respirator with the advisable filter, and use nitrile gloves so that you lot don't come into contact with potential allergens.

- As toxic fumes tin exist produced when processing resin, we recommend that yous wear a respirator mask when processing resin in rooms.
- Even though professional person resin promises to exist non-toxic, we believe that health comes starting time and you tin eliminate whatever negative effect.
View on Amazon

- Resin should of grade non get in your eyes
- Therefore you should habiliment safety glasses when working with epoxy resin to protect yourself
View on Amazon
More interesting Blogposts near Epoxy Resin
Looking for tutorials on resin / epoxy resin techniques?
- All-time Epoxy Resin – Find the perfect Epoxy Resin for all your projects
- Resin Epoxy Art – Basics for your first Steps in Resin Fine art
- Beach Art – Tutorial for Resin Art with Textures
- Resin Geode Fine art DIY – Casting your get-go Geodes yourself
- Resin Epoxy Estimator – Simply Summate the Amount of Resin you Need
Chief image: © chonticha – stock.adobe.com
Source: https://acrylgiessen.com/en/wood-epoxy/
0 Response to "What Is the Best Poly Finish to Show Off the Growth Rings of a Log Slice for Art"
Mag-post ng isang Komento